

Installing HVAC ductwork is one of the most important home improvement projects a Worcester homeowner can undertake. A properly installed duct system means consistent comfort in every room, lower energy bills, and cleaner indoor air for your family. Done poorly, it means hot and cold spots, sky-high utility costs, and indoor air quality problems that can persist for years.
At Airvance Solutions, we’ve helped hundreds of Worcester-area homeowners with professional air duct installation and repair. In this guide, we break down the entire process into 7 manageable steps, giving you a clear picture of what’s involved so you can make smart decisions for your home.
Assess Your Home’s Heating & Cooling Needs
Every successful duct installation begins with a proper Manual J Load Calculation, an industry-standard assessment that determines how much heating and cooling each room in your home requires. This calculation accounts for your home’s square footage, ceiling height, window placement, insulation levels, and local climate.
For Worcester homeowners, this step is especially important. Our region’s harsh winters (average lows of 12°F in January) and warm summers mean your system needs to handle significant temperature extremes. Undersizing ducts means rooms stay uncomfortable; oversizing wastes energy and increases costs.
What the Assessment Covers:
- Room-by-room heat loss calculations
- Solar heat gain through windows and walls
- Insulation quality in walls, floors, and attics
- Number and size of occupants
- Number of appliances and heat-generating devices
- Air infiltration through gaps and cracks
Design & Map the Duct Layout
Once you know your load requirements, it’s time to draw the duct layout. A good layout minimizes the total length of ductwork (reducing energy loss), avoids sharp bends, and positions supply vents where conditioned air will distribute most effectively throughout the room.
In Worcester homes, especially the older Victorians, colonials, and multi-family homes throughout neighborhoods like Main South, Tatnuck, and Burncoat, duct routing can be complex. Ceiling voids, crawl spaces, and finished basements all affect where ducts can be placed.
Layout Design Principles:
- Trunk-and-Branch System: A central trunk line runs from the air handler, with smaller branch ducts extending to each room. This is the most common design for Worcester homes.
- Extended Plenum System: A variation of trunk-and-branch where the main duct stays the same size throughout, easier to install but less efficient for larger homes.
- Radial (Spider) System: Individual ducts run from a central plenum directly to each room, and works well in single-story homes and homes with open attic or crawl space access.
Choose the Right Duct Materials
The material you choose for your ductwork has a major impact on performance, longevity, and cost. There are three main options used in Worcester homes today:
Sheet Metal Ducts (Recommended)
Galvanized steel sheet metal ducts are the gold standard in residential HVAC duct installation in Worcester. They’re rigid, extremely durable (lasting 30+ years), resistant to mold, and smooth on the inside, which means less air resistance and better airflow. Sheet metal is also the easiest to clean and maintain professionally.
Flexible Fiberglass Ducts
Flexible ducts are less expensive and easier to route around obstacles. However, they’re more prone to sagging, kinking, and collecting dust and moisture. They also degrade faster, particularly in New England’s humid summers. If used, they should be kept as short and straight as possible.
Fiberboard Ducts
Fiberglass duct board is pre-insulated and provides some sound dampening. It’s less common in newer installations due to concerns about mold growth and air quality when the inner lining degrades. The air duct cleaning specialists at Airvance often find these require more frequent maintenance.
Gather Tools, Materials & Obtain Permits
Before the first section of duct goes up, you need the right tools on hand and any required permits from the City of Worcester. Attempting ductwork without a permit can lead to fines and problems when selling your home.
Essential Tools for Duct Installation:
- Sheet metal snips (left-cut, right-cut, and straight)
- Tin snips and aviation shears
- Duct crimper and offset tool
- Electric drill with sheet metal bits
- Measuring tape and duct calculator
- Mastic sealant and/or foil-backed HVAC tape
- Duct insulation wrap (R-6 or R-8 for unconditioned spaces)
- Safety glasses, gloves, and dust mask
- Pencil marker and straightedge
Worcester Building Permits:
The City of Worcester requires a mechanical permit for new HVAC ductwork installation. You’ll need to submit plans to the Building Department at City Hall. A licensed HVAC contractor (like Airvance Solutions) can handle all permitting on your behalf, ensuring the installation passes inspection the first time.
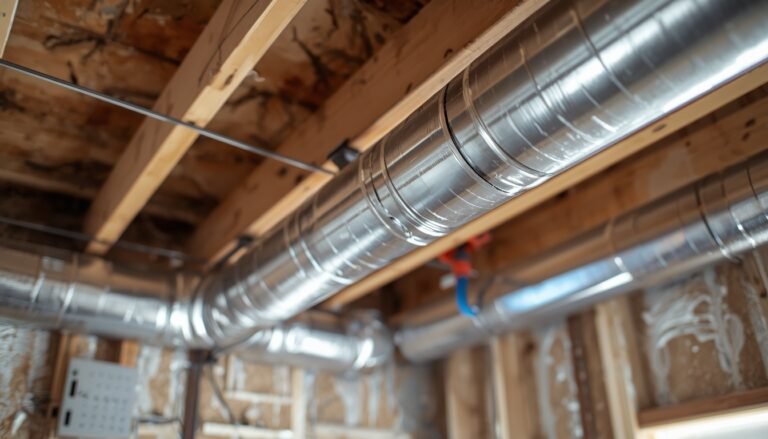
Install the Main Trunk Line First
The trunk line is the backbone of your duct system, a large-diameter duct that runs from your air handler or furnace through the central part of the home (typically in a basement or crawlspace ceiling). Everything branches off this main line, so getting it right is critical.
Trunk Line Installation Steps:
- Position the plenum the box that connects directly to the air handler, squarely and level. This is where all conditioned air originates.
- Run the trunk line along your planned path, connecting sections with drive cleats or slip joints. Keep it as straight as possible.
- Hang the duct properly support it every 4–6 feet using straps or threaded rods. Unsupported sections sag, create noise, and restrict airflow.
- Reduce duct size as you move away from the air handler, this maintains consistent pressure throughout the system.
For Worcester homes with finished basements, the trunk line often runs in a soffit box built along the ceiling perimeter. Our team at Airvance Solutions specializes in clean, space-efficient trunk line routing that preserves basement headroom.
Run Branch Ducts to Each Room
With the trunk line in place, it’s time to extend branch ducts to individual rooms. Branch ducts are smaller-diameter runs (typically 4″–8″) that carry conditioned air from the trunk line to the supply registers in each room.
Branch Duct Best Practices:
- Keep branch runs as short and straight as possible
- Limit the number of bends — each 90° elbow reduces airflow by the equivalent of several feet of straight duct
- Route through interior walls or floor cavities when possible to avoid temperature extremes
- Use 45° angles instead of 90° turns wherever the layout allows
- Size each branch based on your load calculations — don’t guess
- Install balancing dampers in each branch to fine-tune airflow
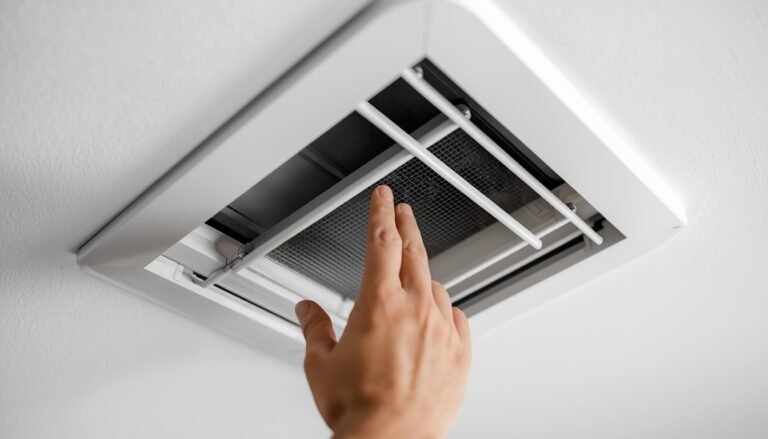
Supply Register Placement:
In Worcester’s cold climate, supply registers should be located at or near exterior walls, ideally under windows. This creates a warm air “curtain” that prevents cold drafts and condensation. Ceiling registers work well for cooling-dominant climates but are less effective for heating in New England winters.
Return air grilles should be on interior walls or ceilings, away from supply registers, to encourage full circulation throughout the room. Our duct installation team in Worcester always calculates return air sizing to match supply air volume precisely.
Seal, Insulate & Test the System
The final, and often most neglected, step of any duct installation is thorough sealing, insulation, and commissioning. Studies show that the average duct system loses 20–30% of conditioned air through leaks. In Worcester’s climate, that translates directly to higher heating bills every winter.
Sealing All Duct Joints:
Apply mastic sealant (a paste-like compound) or UL-listed foil-backed tape to every joint, seam, and connection point. Pay special attention to:
- Plenum connections at the air handler
- All takeoff connections on the trunk line
- Each section joint in the trunk and branch ducts
- Boot connections where ducts meet floor or wall registers
Insulating Ducts in Unconditioned Spaces:
Any ductwork running through attics, crawlspaces, or unheated garages must be insulated to at least R-6 in Massachusetts (R-8 is recommended for attics). Uninsulated ducts in a cold Worcester attic can lose enormous amounts of heat before the air even reaches your living space.
System Testing & Balancing:
Once installation is complete, run the system and check airflow at every register with an anemometer or flow hood. Adjust dampers until airflow matches the design targets for each room. Check for any unusual noises, rattling or whistling usually indicates a loose connection or improperly sealed joint.
For the most accurate results, a professional duct leakage test (called a “duct blaster” test) can verify that your system meets the ≤4 CFM25 per 100 sq ft leakage standard required by Massachusetts energy code.
When to Call a Professional HVAC Duct Installer in Worcester
While this guide gives you a thorough understanding of the installation process, HVAC duct installation in Worcester homes is, in most cases, best left to licensed professionals. Here’s why:
- Code compliance: Massachusetts requires licensed mechanical contractors for HVAC work in most residential applications. Permitted work protects your home’s value and insurability.
- Precision sizing: Improperly sized ducts, even by a small margin, cause noise, uneven temperatures, and HVAC unit failure over time.
- Warranty protection: Most HVAC equipment warranties require professional installation and periodic air duct cleaning to remain valid.
- Time and cost: A professional team completes in hours what a DIY project might take weeks, and gets it right the first time.
The team at Airvance Solutions brings deep expertise to every Worcester duct installation project, from new construction to complete system replacements in older homes. We also offer comprehensive dryer vent cleaning and chimney cleaning services to keep your entire home ventilation system in peak condition.
Frequently Asked Questions
How much does HVAC duct installation cost in Worcester, MA?
The cost of duct installation in Worcester typically ranges from $1,500–$5,000 for a partial system and $8,000–$20,000+ for a full home installation, depending on home size, complexity, and materials. Contact Airvance Solutions for a free personalized estimate.
How long does HVAC duct installation take in a Worcester home?
A professional duct installation for an average Worcester home (1,800–2,500 sq ft) typically takes 2–4 days. Larger homes or complex routing can take up to a week. We always provide a clear project timeline before work begins.
Do I need permits for duct installation in Worcester?
Yes. The City of Worcester requires a mechanical permit for HVAC ductwork installation. Airvance Solutions handles all permitting as part of our installation service.
Can Airvance Solutions repair existing ducts in my Worcester home?
Absolutely. Our air duct repair service in Worcester addresses leaking joints, disconnected sections, collapsed flex duct, and more. We often find and fix duct problems during our inspection process at no extra charge.